Schedule file: Difference between revisions
| Line 324: | Line 324: | ||
==== Material No. (Prior Schedule)==== | ==== Material No. (Prior Schedule)==== | ||
For reusing material from a previous schedule, one | For reusing material from a previous schedule, one MUST enter the prior Schedule No. This will prevent the system from automatically creating new entries in the [[Material_File| Material File]] for the new schedule (as the schedule is actually just reusing the materials of a previous schedule and not using a new material). Effectively, materials are automatically identified from the schedule data entry from the first schedule number on which they are used. | ||
==== Brand Code ==== | ==== Brand Code ==== | ||
Revision as of 06:51, 23 February 2016
Quick notes
Menu Location
Using the mouse: Menu > Media > Schedules > Schedule File
Using the keyboard: Alt+M, M, S, S
Easy Reference
Refer General User interface
How it works
Section 1
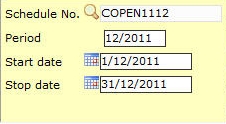
Schedule no.
Reference number to access schedule.
Create new schedule or Open an existing schedule.
The schedule number can either be generated automatically or manually entered (See Schedule Numbering)
The system gives us the option to Create a new schedule or Copy from an existing schedule/plan.
Period
Period for which ads are scheduled. Shows the current month and year by default.
Enter the period for which Schedule is created.
Start date & Stop date
The start and end date of the ad campaign. These fields show First and Last day of Month for which schedule is created.
Select the desired Start and End Dates.
You can book for a maximum of 365 days at a stretch.
Section 2
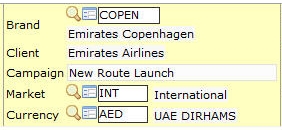
Brand
Shows Product name of Schedule.
Enter brand code, search for existing brand or create new brand.
Client
Client company to which Brand belongs to.
This info is obtained from client name field in the Client and Brand file where this brand is present.
Campaign
Name of Marketing/Advertising Campaign.
Market
Target Market for Campaign.
Enter market code, search for existing market or create new market.
Currency
Invoicing Currency.
Base currency is taken as default if no currency is mentioned in the client and brand file used by the schedule.
Section 3
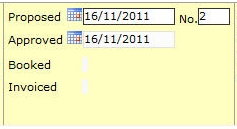
Proposed
Date at which the ad campaign was proposed.
Default value is current date.
(Proposal) No.
Current Proposal version no.
Proposals are user controlled versions. You may send revised proposals to the client and NEOSYS allows you to keep track of all the proposals generated by saving them under different proposal numbers.
The first time a schedule is saved, proposal number is 1. Every time a schedule is saved you have the option of updating the schedule to a new proposal number and hence keep an audit trail of all changes made to the schedule.
Approval date
Date at which the campaign is approved.
A schedule has to be approved for it to be booked.
If an unapproved schedule is being booked the system marks it as approved and the approval date is updated automatically (after prompting the user) with the current date.
Booked & Invoiced
Dates at which the schedule is fully booked and invoiced.
Dates are updated automatically when the schedule is booked and invoiced.
Section 4
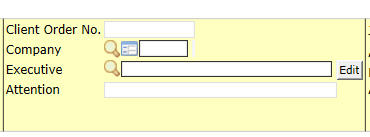
Client Order No.
Shows the client purchase order number, if any. This has to be entered manually and appears on the schedule and invoice printout.
Company Code
Company of the schedule creator.
Enter existing company code or Search for specific company.
In case of a single company this is updated automatically and if there are multiple companies it has to be entered manually.
Executive
Shows current Schedule Owner's Name.
Default executive name is picked up from the Client and Brand file of the selected brand, otherwise it is updated with the current user's User code as shown in the User details page in NEOSYS. For more info see Executive in Client and Brand File
If you want to remove executives from the list, see How do I remove executives that are no longer present or required in NEOSYS
Attention
Shows Client Representative's Name.
Note- Field is updated automatically from client record in the Client and brand file.
Job No.
Shows job no. of related job.
Enter job no. code, search for existing job no. or create new job no..
By entering Job No. we can link the schedule to the job. This also helps us to print corresponding job no. on various schedule printouts.
Section 5
Media Vehicle
Shows media vehicle to be booked.
Enter vehicle code, search for existing vehicle or create new vehicle.
Specifications
Shows the vehicle specifications booked.
Enter existing specifications code or Search for specific specifications.
Loading
Shows the vehicle loading specifications booked. Loading specification is a premium specification being booked.
Either enter a loading specification manually or if the vehicle has a ratecard defined use F7 to select from the drop down
The Specification and Loading fields are directly linked to the rate cards. Assuming the rate cards have been entered in NEOSYS, the cost of the ad and the loading charges are automatically calculated by the system based on the size of the ad which is then entered in the bill and cost section.
"Loading" field is optional and can be configured not to appear in Media Configuration File. See Configure Loading in Media Configuration File
Position/program
Dates
Shows planned ads on a date grid.
Clicking on the folder icon opens media diary showing ads for one schedule line only.
Certify Button
Certify Planned Ads.
Click on this button to open list of planned ads which can be certified.
Refer to Certificate/Voucher File to learn about certification.
There is a limit to the No. of Ads selected for certification. Only the first 300 ads will be displayed on the certification screen.
Book Button
Book Ads and issue booking orders to be sent to supplier.
Click on this button to open Media booking order where the booking details are entered as required and a preview of the booking order can be viewed before issuing the final order.
See New Booking Orders/Cancellations
Diary Button
View the schedule information in media diary format.
Click on this button to view ads from the schedule in Media Diary.
See Media Diary
Invoice Button
Issue invoices to the client.
Click on this button to open the New media invoice page where changes can be made as required and the proforma invoice can be viewed before creating the invoice.
NEOSYS recommends to always check the proforma invoice before invoicing the client in order to avoid mistakes on the original invoice.
Time/Material/Days
Enter the time of day at which the ad appears in the Time field. This applies in case of TV or Radio spots. Example: 08:00, 15:00 etc.
Time range can also be entered. This allows the booking requirements to be more clearly expressed to the media and also enables more accurate reconciliation with monitoring systems. E.g. 8:00-9:00
Days shows the day of the week at which ads are restricted to appear on. Example: Enter 1 for Saturday, 2 for Sunday and so on.
The start day of the week can be configured in the Market file. See Market File
Schedule lines can be hidden/filtered by double clicking position/program/times/material/days)
Plan Ads
Shows the total number of ads that can be planned per week for a vehicle.
Enter permitted number of ads per week separated by "/" symbol.
Example: Entering 10/10/10/10 will restrict no. of ads per week to 10.
Clear Button
Selectively clear ads by status. Status Options are:
- Unbooked
- Ads without certificate/voucher copy/tear-sheet/supplier invoice
- Ads with rejection certificate/voucher copy/tear sheet
- Uninvoiced
- All
Material Button
Shows reference data regarding the materials sent to the supplier.
Dates Button
Select dates to schedule ads.
Opens a date grid which can be used to enter number of ads on desired days.
Book Button
Book only Ads belonging to that row (Media Vehicle).
Opens a media booking order showing only ads of that row (Media Vehicle) which can be booked.
If you click "Book" on a line which has never been booked then the system offers to book all lines for the same media vehicle that are have never been booked and are not currently hidden/filtered.
Free Button
Mark Ads as "Free".
Opens a date grid showing planned ads for that row (Media Vehicle) which can be marked as free.
Ads can be free to agency or to client or to both, NEOSYS allows you to choose all options and the system automatically makes the changes in the bill and cost section based on the number of free ads to the client or to the agency.
Clear Button
Clear Scheduled Ads.
Click on this button to open a date grid showing planned ads for that row (Media Vehicle) which can be cleared.
Material Button
Shows reference data regarding the materials for that row (Media Vehicle) sent to the supplier.
Order No.
Shows order numbers of all the booking orders generated.
Click on the icon or Press F6 to view booking order.
Bulk Ad
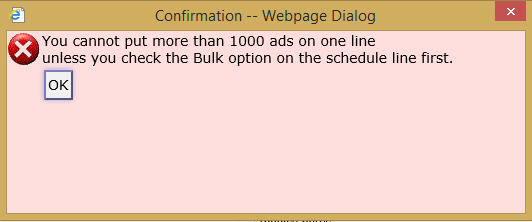
Checking this option allows user to add unlimited ads for a vehicle, specially in digital and radio/tv media where there are hundred thousand impressions and hundreds of ads.
You can enable this feature in the vehicle file itself so that you don't have to check it every time you want to ad unlimited ads, as NEOSYS will not allow any user to add unlimited ads without enabling this feature either in schedule or vehicle file.
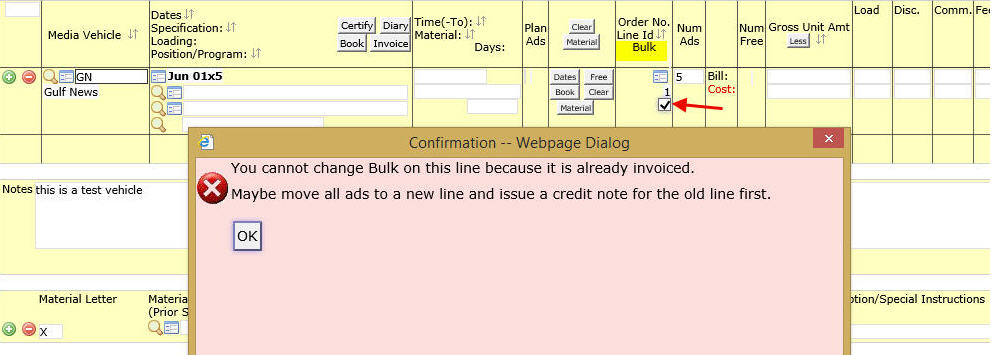
For already invoiced ads NEOSYS will not allow users to enable this feature and instead will ask to create a new line for that vehicle.
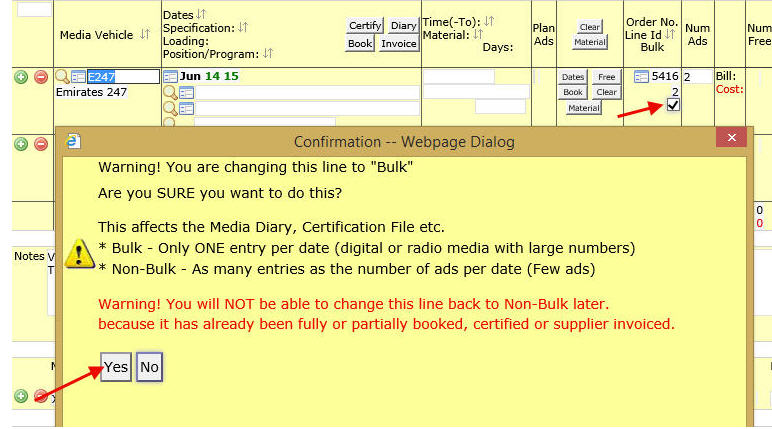
For already booked/certified ads NEOSYS will only give a warning before enabling the Bulk ad feature and will allow you to enable it.
Screenshot below of already invoiced ads followed by the screenshot of booked ads.
No. Ads
Shows the number of ads planned in the Dates calendar on the schedule line.
Bill and Cost Section
Shows details about the cost to the agency and client, discounts received and given, commission, etc. that are entered in the bill and cost section.
If the vehicle currency is different from the invoice currency, the system calculates the invoice amount based on the exchange rate entered in NEOSYS.
The system prompts:
- when the cost to the agency is more than the cost to the client the system prompts the user about the same and once that is confirmed a reason for the unprofitability has to be mentioned.
- when the user when the cost to the client is over 50% than the cost to the agency. This feature helps avoid entering of incorrect amounts in the schedule.
Num Free
Shows no. of ads that were marked free for that vehicle.
Gross Unit Amt
Shows the Gross Unit Rate per Ad.
Rate is automatically updated from the ratecard but can be changed in the schedule as required.
More Button
Shows the Loading/Discount/Commission/Fees fields.
Enter the appropriate loading, discount, commission or fees charged.
Loading/Discount/Commission/Fees/Tax/Other amounts can be entered as a percentage of Gross Unit Amount or number.(Example: "10%", "20%" or just "100", "200".)
Net Unit Amount
Shows Net Unit Amount after taking the loading/discount/commission/fees.
Amount
Shows total amount i.e. Net Unit Amount * number of Ads.
Exchange Rate
Shows the Exchange rate for currency of vehicle chosen to invoicing Currency.
Exchange rate is taken from Currency & Exchange Rate File depending on the starting date of the schedule and effective date in currency and exchange rate file.
Invoice Amount
Shows total amount in chosen invoicing currency.
Vehicle Name
Shows name of vehicle chosen for advertising.
Section 6
Notes
Shows any reference information regarding the schedule. If there are notes on the vehicle record of the selected vehicle, you are given the option of adding those notes to this section as you enter the vehicle code. These notes appear only on the schedule printouts.
Invoice Notes
Shows notes regarding the invoicing which appears on all invoices issued from the schedule.
Material Details
Shows material/artwork details which can be selected to appear on the schedule and invoice printouts. You can also upload images on the schedule with reference to the artwork.
Section 7
Material Letter
Shows the material letter used in the Dates calendar of the schedule.
Material No. (Prior Schedule)
For reusing material from a previous schedule, one MUST enter the prior Schedule No. This will prevent the system from automatically creating new entries in the Material File for the new schedule (as the schedule is actually just reusing the materials of a previous schedule and not using a new material). Effectively, materials are automatically identified from the schedule data entry from the first schedule number on which they are used.
Brand Code
The brand code can be indicated per material code. This is useful when there are multiple brands on a media schedule since one cannot otherwise indicate multiple brands on a schedule. If the brand code per material is not specified (i.e. left blank) in the material table then the overall schedule brand code is used instead.
Size/Duration
Although material size can be written per line in the main body of the schedule, if you want size to show in the list of materials, it must be re-entered in this field. This is because although you can indicate a pattern of materials with different sizes within one line of the schedule (A,B,C etc) but there is only one column to enter the size for all of them. So in this case the size cannot be usefully entered in the lines of the schedule and must be entered below per material.
The size entered must consist of two numbers. Eg. 10X5, 10CM5COL, 2 MIN 1 SEC etc. Characters A-Z and space can be used. Numbers may contain a decimal point and must be positive.
Material Code
Field indicating if Material is pending delivery. Enter anything to indicate that material is not pending delivery (this will take the material off from the material pending list).
View/Upload
Uploads files related to materials. Can also be used to view the file if it has already been uploaded. If a * is present near this button, it means that a file has already been uploaded for this material.
Material Description/Special Instructions
Allows you to add the material description and special instructions to be followed by the supplier.
Section 8
Invoice Section
Shows a list of the invoices issued from the schedule with the invoice details.
Invoice date
Shows the date the invoice was created.
Invoice No.
Shows the invoice number.
Amount
Shows the invoice amount.
Click on the icon or Press F6 to open invoice.
Cost(Base)
Shows amount in the base currency regardless of the invoice currency.
Click on the icon or Press F6 to open invoice.
User Name
Shows who created the invoice.
Date/Time
Shows when the invoice was created.
Station
Shows the IP address of the computer used to create the invoice.
Section 9
Version section
What is a version?
NEOSYS document versions provide a complete verifiable audit trail of who has done what, where and when in NEOSYS. There is no user interface to amend these records and versions are numbered sequentially to make it harder to tamper with.
Every time anyone creates or updates a record in NEOSYS, NEOSYS records their username, the time and date, the workstation number. It also keeps a copy of the old record.
At the bottom of each record on screen, you can see a complete history of creation and all amendments and you can click on any individual amendment to see the prior record.
If the same user makes more than one change to a particular record in one day then only one historical version will be retained for reference but the date, time and workstation number of all updates is records. This is to save wasting space in the database.
How do I save a schedule as a different version?
Each time a schedule is saved you are given the option of updating to a proposal number. If you go ahead with updating to a new proposal number automatically a new version number is created.
Version
Shows the version number and number of times changes have been made to the document.
Click on the icon or Press F6 to view older version.
Proposal
Shows the number of times the document has been updated to a proposal number.
User name
Shows who made the changes to the document.
Date/Time
Shows when the changes were made.
Station
Shows the IP address of the computer used to make the changes.
