Using NEOSYS Timesheets System: Difference between revisions
| Line 38: | Line 38: | ||
Below are various ways that non-job users can enter timesheets: | Below are various ways that non-job users can enter timesheets: | ||
* Enter hours | * Enter hours for actual job: This might be possible in cases where a media schedule also has a corresponding job. But this might not be possible in cases where each media schedule has multiple corresponding jobs or if a media schedule has no job. | ||
* 1 "fake" job per schedule: This might not be practical for certain roles, eg. Media Bookers because when they discuss booking with suppliers, they might discuss multiple schedules at the same time. So it is difficult to give a breakdown of their hours per schedule. | * 1 "fake" job per schedule: This might not be practical for certain roles, eg. Media Bookers because when they discuss booking with suppliers, they might discuss multiple schedules at the same time. So it is difficult to give a breakdown of their hours per schedule. | ||
Revision as of 08:38, 30 May 2016
Compatibility
The new NEOSYS timesheet system which has the extension "neosys2" to the URL address only works on Internet Explorer for PC and Mozilla Firefox or Safari 5.0 for Mac.
Entering Time Sheets
1. Scroll to Menu > Timesheets > Timesheets File 
2. You will come across the following screen 
- Select the date for which timesheet is to be entered
- Enter an existing Job no. or Press F7 to search. You can view Job details by entering job no. and Pressing F6. Click on (+) to enter multiple Jobs
- Select appropriate 'Activity'
- Enter the Time Duration or use the Timer feature to record time for an activity, by clicking on the Play button. You could also enter the start and stop time directly into the respective fields. The timesheet is automatically saved every 5 minutes to prevent loss of data in the event of loss of network or internet.
- Enter necessary comments in 'Details'
3. Click on Save
Using Time Sheet Printout Menu
1. Scroll to Menu > Timesheets > Timesheets Printout 
2. You will come across the following screen 
3. Enter required time period
- Choose Personal to view Time Sheets of the user currently logged in
- Choose Consolidated to view Time Sheets of all users
- Choose Reminder Emails to send reminder emails to users to enter Time Sheets
- Choose Approval Emails to send emails to authorized people requesting for approval of Time Sheets entered.
4. Click on Ok
Generating Timesheet Analysis Reports
- Go to Menu > Timesheets > Timesheet Analysis (Keyboard Shortcut - Alt+M, T, A)
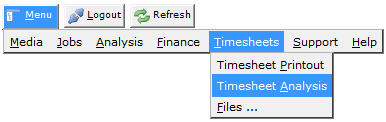
- Please See Timesheet Analysis

Exporting Timesheets Per Activity
To avoid exporting everything and then filtering in Excel you can select the desired activities before exporting and you can use "Find" in the popup to search for activities that are common to more than one department like "admin" or "leave" etc.

Using Timesheets for non-job users
Timesheet hours can be entered only for jobs, not for schedules.
Below are various ways that non-job users can enter timesheets:
- Enter hours for actual job: This might be possible in cases where a media schedule also has a corresponding job. But this might not be possible in cases where each media schedule has multiple corresponding jobs or if a media schedule has no job.
- 1 "fake" job per schedule: This might not be practical for certain roles, eg. Media Bookers because when they discuss booking with suppliers, they might discuss multiple schedules at the same time. So it is difficult to give a breakdown of their hours per schedule.
- 1 "fake" job per client: Non-job users can use these fake jobs to enter hours spent per client. They can enter the campaign name as the Details in the Timesheet file. End of month, you can take reports like Timesheet Analysis reports to get an idea of how may hours were spent on each client. Using that information, you can invoice the client for the hours spent. This method can be carried out side-by-side with the method of entering hours for real jobs or for fake "admin/sick" jobs. Below section explains how to enable automatic creation of jobs when creating a brand.
Automatic job creation while creating a new Brand
In the Client and Brand file, enter the Brand's account number in the format "account no, company code". This will automatically create a job for that particular client for that particular company.
Example:


Brands that have their account numbers entered in this manner should be used only for the purpose of creating "fake jobs" for timesheets. They should not be used for entering real jobs or schedules because they will create inter-company accounting entries when they are invoiced.