Using NEOSYS Timesheets System: Difference between revisions
From NEOSYS User Support Wiki
Jump to navigationJump to search
No edit summary |
|||
| Line 1: | Line 1: | ||
=== Compatibility === | |||
The new NEOSYS timesheet system which has the extension "neosys2" to the URL address only works on Internet Explorer for PC and Mozilla Firefox for Mac. | |||
=== Entering Time Sheets === | === Entering Time Sheets === | ||
1. Scroll to Menu > Timesheets > Timesheets File <BR>[[image:timesheet_timesheetfilemenu.jpg]]<BR> | 1. Scroll to Menu > Timesheets > Timesheets File <BR>[[image:timesheet_timesheetfilemenu.jpg]]<BR> | ||
Revision as of 09:03, 29 January 2012
Compatibility
The new NEOSYS timesheet system which has the extension "neosys2" to the URL address only works on Internet Explorer for PC and Mozilla Firefox for Mac.
Entering Time Sheets
1. Scroll to Menu > Timesheets > Timesheets File 
2. You will come across the following screen 
- Select the date for which timesheet is to be entered
- Enter an existing Job no. or Press F7 to search. You can view Job details by entering job no. and Pressing F6. Click on (+) to enter multiple Jobs
- Select appropriate 'Activity'
- Enter the Time Duration
- Enter necessary comments in 'Details'
3. Click on Save
Using Time Sheet Printout Menu
1. Scroll to Menu > Timesheets > Timesheets Printout 
2. You will come across the following screen 
3. Enter required time period
- Choose Personal to view Time Sheets of the user currently logged in
- Choose Consolidated to view Time Sheets of all users
- Choose Reminder Emails to send reminder emails to users to enter Time Sheets
- Choose Approval Emails to send emails to authorized people requesting for approval of Time Sheets entered.
4. Click on Ok
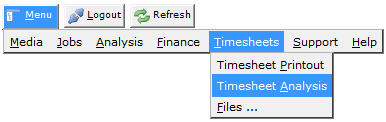
Generating Timesheet Analysis Reports
- Go to Menu > Timesheets > Timesheet Analysis (Keyboard Shortcut - Alt+M, T, A)
- Please See Timesheet Analysis
