Configuring Document Footers: Difference between revisions
No edit summary |
|||
| Line 35: | Line 35: | ||
== Configuring Personal Signatures (JPEG image) to appear on Document Footers == | == Configuring Personal Signatures (JPEG image) to appear on Document Footers == | ||
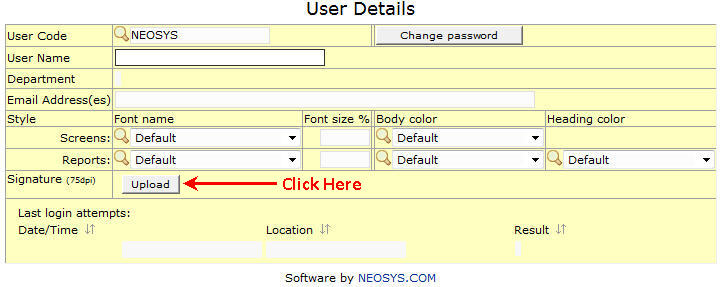
Users can configure their personal signatures on the USER FILE by uploading a JPEG image of the same as shown below : | |||
[[File:user1.jpg]] | |||
Now follow the instructions that follow as shown in the screenshot below : | |||
[[File:user2.jpg]] | |||
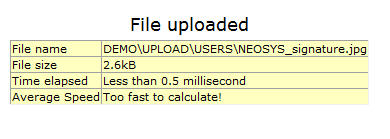
Once the desired file is uploaded successfully, a file upload summary would be displayed as follows : | |||
[[File:user3.jpg]] | |||
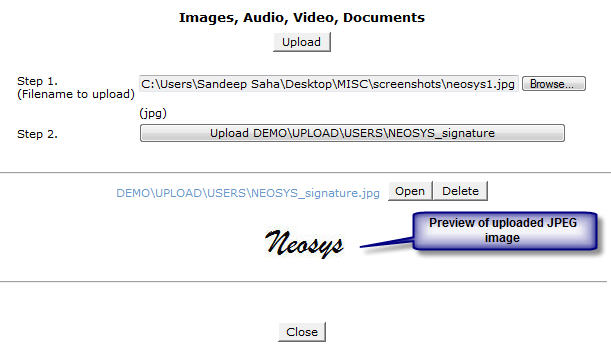
Once you close the file upload summary, you would see a preview of the uploaded JPEG image. | |||
[[File:user4.jpg]] | |||
If you would like to delete the uploaded image, click the <b>"Delete"</b> button to do so. | |||
To replace the uploaded image with a new one, you may simply click <b>"Upload"</b> and upload a new image which would overwrite the previous one. | |||
NEOSYS does not limit a user's JPEG file to a particular size and neither does it allow them to enter width / height, as autoresizing often makes an image look bad due to loss of quality. The user must upload a suitably sized signature. | |||
Also note that signatures uploaded in live database do NOT show in test-data at the moment. | |||
Revision as of 13:58, 11 August 2011
Location of JPEG Images for Company Stamp/Signature
Make sure the JPEG image is located in the neosys/data/xxx folder (where "xxx" is the database code)
Single Company Installation
In the Media / Job Configuration File, Scroll down to the Invoice Footer field under the Invoicing section and add the script
<img src = imagename.jpg></img>
where "imagename.jpg" is the name of the JPEG image.
Booking Orders
In the "Media Types File", add a new line in the "Order Footer" and add the script
<img src = imagename.jpg></img>
where "imagename.jpg" is the name of the JPEG image.
Multiple Company Installation
In the Media / Job Configuration File, Scroll down to the Invoice Footer field under the Invoicing section and add the script
<img src = imagename%COMPANYCODE%.jpg></img>
and "imagename%COMPANYCODE%" will be converted to "imagenameXYZ" where "XYZ" stands for the company code in capitals.
Booking Orders
In the "Media Types File", add a new line in the "Order Footer" and add the script
<img src = imagename%COMPANYCODE%.jpg></img>
and "imagename%COMPANYCODE%" will be converted to "imagenameXYZ" where "XYZ" stands for the company code in capitals.
Users can configure their personal signatures on the USER FILE by uploading a JPEG image of the same as shown below :
Now follow the instructions that follow as shown in the screenshot below :
Once the desired file is uploaded successfully, a file upload summary would be displayed as follows :
Once you close the file upload summary, you would see a preview of the uploaded JPEG image.
If you would like to delete the uploaded image, click the "Delete" button to do so.
To replace the uploaded image with a new one, you may simply click "Upload" and upload a new image which would overwrite the previous one.
NEOSYS does not limit a user's JPEG file to a particular size and neither does it allow them to enter width / height, as autoresizing often makes an image look bad due to loss of quality. The user must upload a suitably sized signature.
Also note that signatures uploaded in live database do NOT show in test-data at the moment.


